How to Make Tin Can Planters
September 1, 2021
It's so easy to recycle your cans and turn them into something beautiful to brighten up your home or garden! Here's our easy to follow guide on how to make Tin Can Planters.
You will need:
- Washed tin cans
- Hammer and nail to punch holes in the base of your tins
- Scissors
- Your choice of fabric, contact, rope or ribbon to cover your cans
- Buttons, ribbon, leaves etc for embellishments
- Spray glue
- Potting soil
- Plants or seeds
How to make:
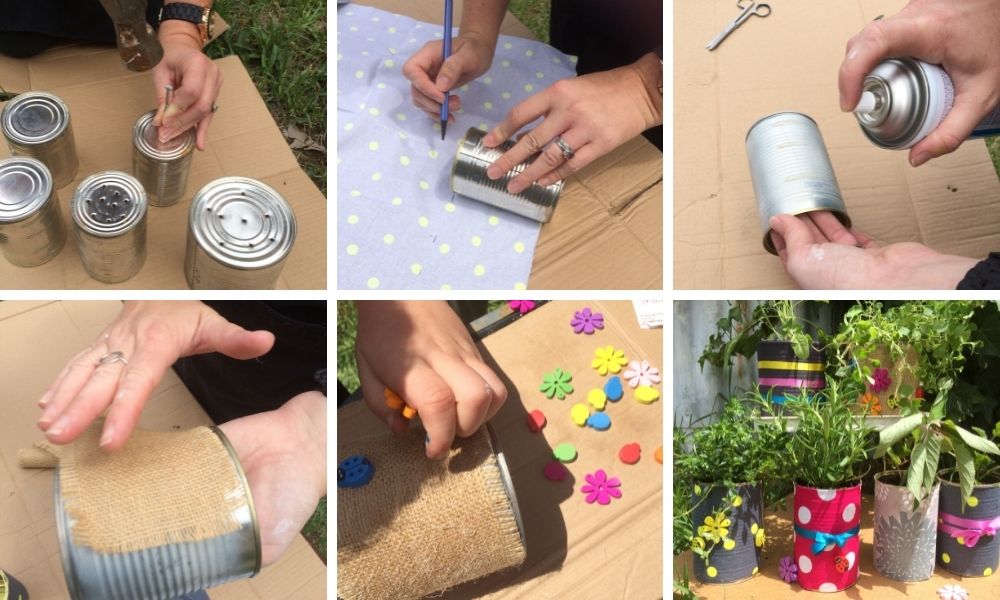
- Wash and remove labels from your used cans then drill or nail and hammer drainage holes in the bottom.
- Measure and cut your chosen fabrics or contact to fit around the cans.
- Coat the cans in spray glue (do this in a well ventilated area and over grass or cardboard to protect from overspray).
- Stick your materials to the cans then trim the edges.
- Add embellishments, ribbon or other decorations to your cans.
- Plant your favourite flowers and herbs in your tin can planters then decorate your windowsill, desk or garden. TIP: our Jiffy 6cm pots fit in a 400g can perfectly!
These tin can planters are a great activity to do at birthday parties or in childcare/vacation care programs and they make a great gift for loved ones or teachers.
Mr Fothergill's has a range of seeds and kits specifically for children view the Little Gardeners range here. And for more child friendly gardening activities be sure to check out our children's gardening blog.


